A couple of years ago we had builders made steel railings for our second floor terrace. At that time we didn't have exact idea how the finished guardrail should look so we left it that way. It was looking like this:

Not too safe I think. It was so-so OK for us, not at all safe for kids, and scary when you had to clean the antenna from snow. This year when we finished the terrace paving it was time to finish the guardrail too.
Steel vs Wood
Initially we were thinking about welding metal profiles to create some kind of grid. Not having electrocautery on hand and with zero experience in welding this meant we had to find someone to do it. This is not the best idea here because each dealing with craftsmen means huge dragging in time and plenty of trash to clean up after that. Yes, most builders here are like this. So wood won for several reasons:
- The final cost will be lower because we'll do it ourselves
- Wood looks better for us
- Unlike welding, fixing the wooden boards is not permanent and will allow us to remove them when needed.
The last reason led to the solution shown below.
The Solution: Attach Flexible Wooden Boards
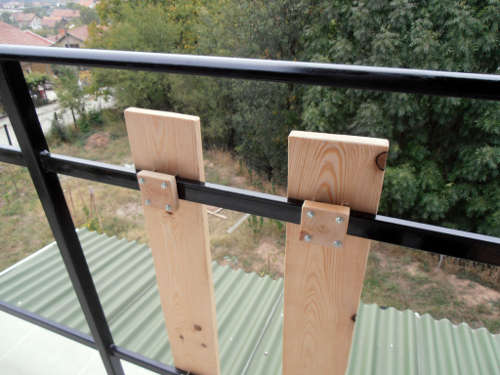
We didn't want to drill vents in the steel parts of the guardrails because it's not easy and will reduce the strength. So we decided to create wooden plates and attach them from the inside with cart bolts. Here is how they look from inside:

We used scrap pieces of a beam for the wooden plates which means they couldn't be large than this size. This required carefully drilling the holes on the exact positions. We had to re-drill some of them so the bolts can fit. After that however the work was easy - just tighten the bolts and you are all set.
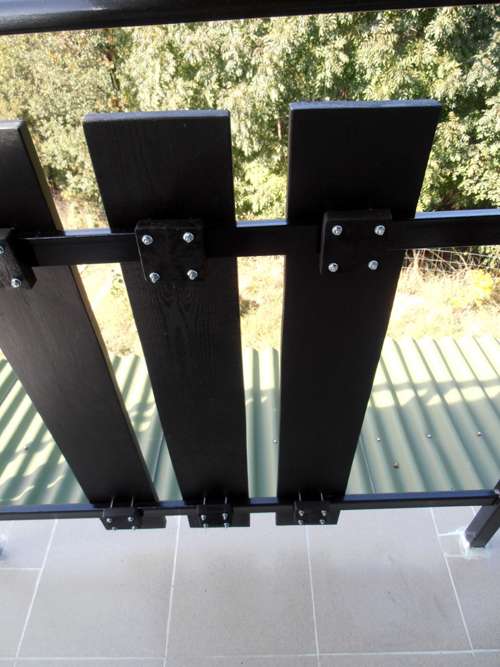
Before this all the boards and plates were finished and painted black so here is the final look of the guardrail:

And from outside:

Few Things to Note
If you plan to do something like this, there are few things to have in mind:
- Use well dried material. Otherwise there is risk of cracking the wood as it dries on the guardrail. We had no choice so now we are waiting to see if the sun will do any damage in the summer. So far everything is fine.
- If possible, drill a bit larger holes for the bolts which will allow some flexibility. It's really hard to make them match perfectly if you use only hand tools so larger holes will help. We used bolts number 5 in which case a drill number 6 will make the perfect holes.
- If you decide to use parts of boards for the wooden plates (instead of a sliced beam), make sure the wooden fibers go vertically when attaching the plates. This will greatly reduce the risk of cracking. This is of course when your steel parts are horizontal like ours. If you are using this idea to attach on vertical metal parts, the wood fibers should go horizontally. The idea is that the force caused by the tightened bolts won't crack the wooden plates.
- You can of course use metal plates or whole boards on the inside. Or maybe a horizontal board that will connect the verticals. This way of joining gives many options.
Finally one of the big advantages of this solution is that it allows removing the boards for fixing, replacing, or doing any other work on the guardrail.
